 MEDIVEERSETHE PRACTICAL HUB
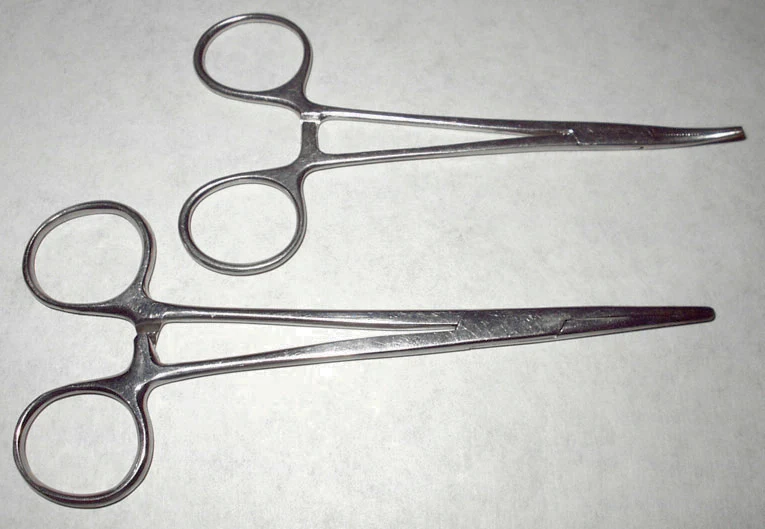
The rings provide a controlled finger grip for opening and closing the instrument.
Zoom in, then drag to inspect. Keyboard: + / − to zoom, arrows to pan, 0 to reset. Tap the numbered markers to explore parts.
Artery forceps / haemostat: Reference view.
Image: Splarka at English Wikipedia · Source / originalResized and converted to WebP; original colours retained. Numbered part markers are Mediveerse annotations.
Artery forceps / haemostat
Hemostat · haemostatic clamp · artery clamp
What is its use?
Temporarily clamps a bleeding vessel so haemostasis can be secured.
Explore the photo before the answer. Zoom into the jaws, inspect the locking mechanism and compare the available reference views.
How to recognise it.
- Ring handles with a locking ratchet.
- Opposing serrated jaws; straight and curved versions are common.
- Inspect the jaw pattern before assigning a named subtype.
A needle holder has shorter, stouter gripping jaws. A Kocher-pattern clamp has terminal teeth.
Name the parts.
Point to each part on your specimen as you say its name.
- Finger rings
- Ratchet
- Shanks
- Box joint
- Serrated jaws and tips
Think first. Then reveal.
Say your answer aloud before opening the suggested response.
01What is the use of a haemostat?+
Temporary vessel compression to control bleeding.
02Why is a ratchet useful?+
It maintains the jaws in a selected closed position.
03Can every artery forceps be identified by its curve?+
No. Inspect serrations, teeth, size and the instrument marking; many patterns have straight and curved variants.
Read the references.
Use these clinical education and instrument references alongside your department’s practical manual. Photo attribution appears below the image.