Identify
Locate the jaws, joint and handles.
 MEDIVEERSETHE PRACTICAL HUB
LOOK CLOSELY / UNDERSTAND CLEARLY
Recognise orthodontic pliers and discuss design-specific use.
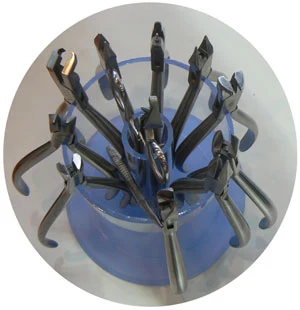
Working end of the rear central instrument in this overview. Exact designs require closer instrument-specific inspection.
Zoom in, then drag to inspect. Keyboard: + / − to zoom, arrows to pan, 0 to reset. Tap the numbered markers to explore parts.
Orthodontic pliers — overview of several designs
Image: Bsz surgico · Source / original · CC BY-SA 3.0Resized and converted to WebP; original colours retained.
Jaw geometry and construction determine whether a plier is intended for bending, gripping, cutting or another specific task.
Locate the jaws, joint and handles.
Match the actual jaw design to its intended function rather than assuming all pliers are interchangeable.
Confirm instrument condition and appropriate wire or component compatibility.
Try answering aloud, then open the suggested answer. Examiner questions vary.
No. Some are designed for bending or gripping.
It helps distinguish intended functions.
No. Confirm intended use and compatibility.
Wear or damage can reduce control and precision.